How to test a distributor with a multimeter
The invention of the multimeter has led to many people trying to fix things by themselves than taking Them to a technician. Engines are complicated systems no one dares to mess with because the least thing you do to a small part may affect the whole system. The distributor of an engine is one of the most important parts it cannot go with. Knowing how to test a distributor with a multimeter will let you know if it is appropriate to send your car to a mechanic or not. Read on how to test a dryer moisture sensor with a multimeter.
What is a distributor? How does it work?
Due to advancements in technology, modern cars do not contain distributors. Though distributor caps were replaced in the 1970s, there are still cars on the road and market that use them and may need replacement if the need arises.
A distributor cap serves as the passage engine where ignition wires pass to the spark plugs to take very high voltage current from ignition wires. His is made possible by virtue of its manufacturing material, that is metal. Through the conductivity of a metal, a linkage is formed between the distributor cap when it comes into contact with the ignition wires. The current then passes through the wire to the spark plugs.
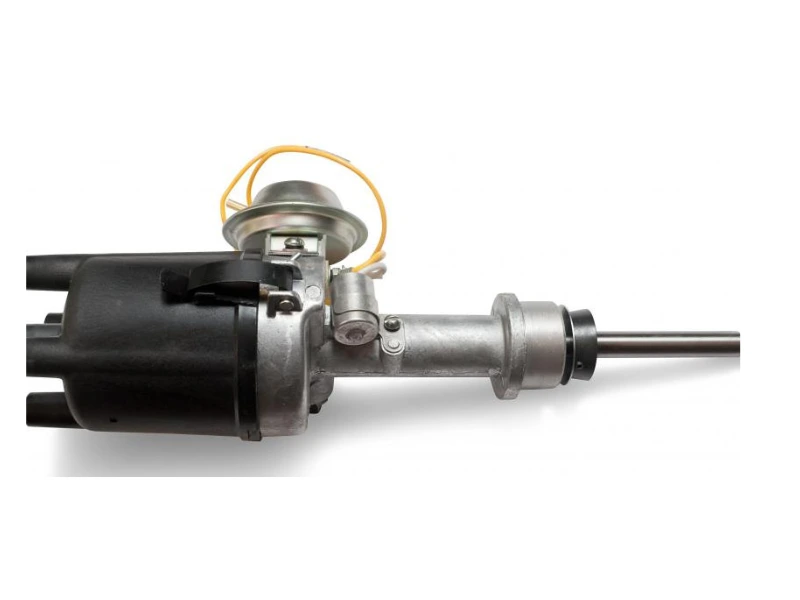
It has a self-turning device called the rotor which is coupled to the shaft. As it spins, it comes into contact with each wire to transfer electrical charge to the wires in order. Read about how cgi is used in movies.
Before delving into how to test a distributor with a multimeter, let’s take a look at how to detect a faulty distributor.
In addition to the rotor, the distributor is also coupled to a vacuum which increases its efficiency by regulating the timing of the sparks. You can also learn how to test a laptop battery with a multimeter.
Why do you test a distributor?
I always recommend people do regular tests on their distributors. However, you need to run tests on the distributor when you face the following problems:
- Engine misfiring and stalling
- Decreased acceleration
- Faulty engine light
- Increased emissions
- An abnormal noise from the engine
You can also test your CD with a multimeter if it turns out that the distributor is in good working condition. These symptoms are similar. We can now take a look a how to test a distributor with a multimeter.
A step-by-step guide on how to test a distributor with a multimeter

Before you use a multimeter, the first thing you need to do is to check for the continuity of the multimeter. In other words, check if it is In a good condition. This is usually denoted by a beep if you are using a digital multimeter which is mostly on the market.
Locate your distributor
This is the easiest part of the procedure. Open the hood of the car and move towards the central part. It is usually a plastic grey with a crown-like cap coupled via black cables to the spokes on top of it.
Tune the multimeter
Since we are measuring the resistance, you should tune the multimeter to about 2000 ohms. You must also have in mind that, the range of the resistance of the connections that pass through the distributor to the distributor cap is between 599 to 1401 ohms.
Test the coiled wires
Connect the test probes of the multimeter to the positive and negative ends of the coil and read the multimeter. Once it is in the normal range, the coils are in good working condition. It should be replaced if the readings are below or above the normal range.
Test the igniter
Connect the test probes to the positive and negative terminals of the wire and read the multimeter again. If the reading is within the range, you have an excellent igniter. If it is out of range, you need a new one.
Test the pick-up coil
Connect the test probes to the positive and negative terminals of the igniter and read the multimeter again. If the reading is within the range, you have an excellent pick-up coil. If the reading is out of range, you quickly replace it.
How to test a distributor cap and rotor
Although the distributor cap and rotor are the first things to check when your car faces the problems I have listed above, it is best you know how to test a distributor with a multimeter. Do you know how to use a multimeter to test a CDI?
Testing for the distributor cap is less exhausting than testing for the distributor with a multimeter. Once you are able to locate and remove the distributor, check for any physical damage. If there is no physical damage and you still have one of the problems, wash the distributor’s cap with a brush made of wire bristles to remove plaques on or in it.
When you remove the rotor, you have to check if there are wide gaps between the contacts of the rotor wires of the distributor cap. You can do this by bringing the rotor to a source of light to see if the gaps between the wires of the rotor and the distributor gap are normal or wide. Wash the rotor with a wire brush to remove plaque from it.
The vacuum advance unit of the distributor is also an essential part that needs to be checked. Check for any physical damages. If there is none, wash the vacuum advance unit to remove plaques from it.
If you find any fault with the distributor cap, rotor, or vacuum advance unit, buy a new one and replace it.
After knowing how to test a distributor with a multimeter, you will be interested in replacing a distributor if it needs to be changed.
How to replace a faulty distributor with a new one
- Remove the faulty distributor cap and rotor.
- Detach the vacuum advance unit from the distributor.
- Detach the wires connecting the distributor and unbolt it from the engine block.
- Remove the distributor
- Fix the rotor to the shaft of the distributor.
- Add the distributor ca and bolt it firmly.
- Couple the vacuum advance unit and screw it tightly.
- Attach all the wires you which lead t the distributor.
- Screw with the right bolts to hold the distributor firmly in position.
Final thoughts on how to test a distributor with a multimeter
After reading this post, you agree with me that I have killed two birds with one stone. This blog contains both the replacement of a distributor and how to test a distributor with a multimeter. I always encourage people to do these simple things by themselves to save them from meeting unscrupulous technicians and also prevent them from wasting money. Another skill you can learn is how to tune a monoblock amp with a multimeter.