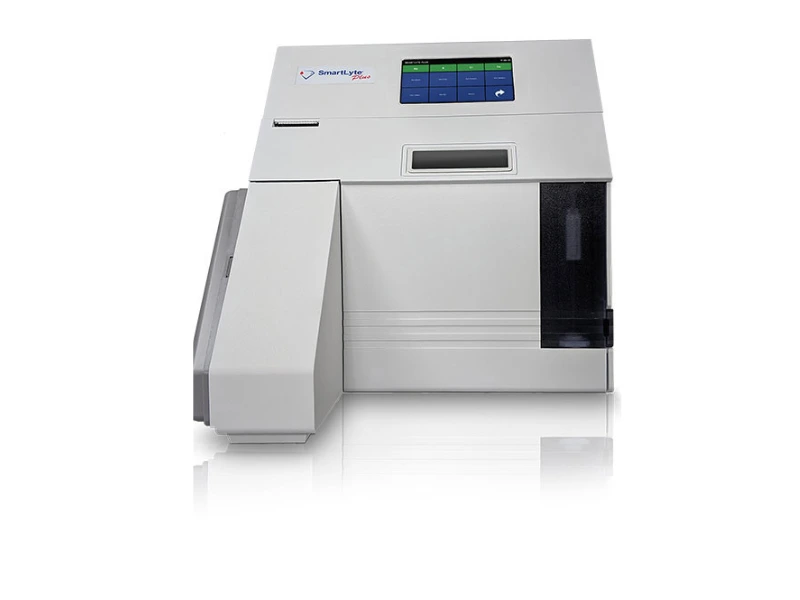
Smartlyte Plus Electrolyte Analyzer
You cannot mention electrolyte analyzers without making mention of smartlyte plus electrolyte analyzer. Like all electrolyte analyzers, it is used to detect and measure the concentration of electrolytes. As we all know these electrolytes are responsible for maintaining fluid balance, pH levels, and healthy neuron and muscle function. Let’s now take a look at why the analyzer is the world’s most advanced electrolyte analyzer. You can also read on 9180 electrolyte analyzer
Specifications of Smartlyte Plus Electrolyte Analyzer
| Mode of operation | Fully automated |
| Principle of operation | Ion selective electrode |
| Sample | Whole blood, serum, plasma, urine |
| Sample volume | 100 ul -Blood, serum, plasma 180 ul – Urine |
| Parameters | Sodium, potassium, chloride, Lithium, Calcium |
| Throughput | 100 samples per hour |
| Calibration | 1-point calibration after each sample 2-point or 3-point calibration every 4 hours |
| Control | Touchpad USB keyboard |
| Power requirement | 100-140V AC 50-60 Hz 1.4 A 50 W |
| Ambient temperature | 41oF-89.6oF |
| Printer | Built-in thermal printer 192 pixels |
| Dimensions | H-13.2in x W- 12.4in x D-11.6in |
| Weight | 12.5 lbs. |
What is the Principle of Operation of Smartlyte Plus Electrolyte Analyzer?
You have read from the specification that, the principle used by the analyzer is the ion-selective electrode technology. It is quite a complex technology that is not fully understood by many people. The basic concept of the ISE is that it computes the sample’s electrolyte level by comparing an unknown number to a known value.
The kind of electrolyte in the sample triggers a particular reaction in an ion-selective membrane. The membrane acts as an ion exchanger by changing its potential or measuring voltage in response to the ion’s electrical charge, which builds up in the film between the sample and the membrane. The difference between the two potential levels on either side of the membrane is calculated by a galvanic measuring chain inside the electrode.
The reference electrode, the reference electrolyte, and the “open terminal” close the galvanic chain through the sample on one side. The other side was sealed by a membrane, an inner electrolyte, and an inner electrode. Find out about the principleipf the tissue processor.
An electrochemical potential form on the membrane of the active electrode due to the differing ion concentrations between the inner electrolyte and the sample. The inner electrode transfers the potential to an amplifier’s input. The second amplifier input is also linked to the reference electrode, as is the ground.
Amplification of the electrode potential enables additional signal processing because the reference electrode is grounded.
Then, using a calibration curve developed from two measured points of standard solutions with precisely known ion concentrations (two-point calibration), the measured voltage of the sample, and the Standard-A reference electrode, the ion concentration in the sample is estimated and shown (one-point calibration).
Step-by-step Guide to Operate the Smartlyte Plus Electrolyte Analyzer
Running a control
- Swirl and mix the control carefully
- Clean the bottle to remove any fluid on it.
- Take the lid off
- Tap on Run Control from the Sample Measurement Menu.
- Tap on the control to be tested.
- Open the door of the probe when Open Door appears on the screen.
- Move the control to the sample probe, making sure the probe aperture is submerged in the solution, to introduce the sample as soon as Load Sample appears on the screen
- Remove control from the probe when WIPE PROBE & CLOSE DOOR is displayed
- Clean the probe with a cotton and close the door
- Wait for he analyzer to finish the test
- Compare your results to the manufacturers results and tap on the save button if it is in range.
- Repeat the test again by tapping on the back button.
Testing for Electrolytes Using Serum
- From the calibration page, tap on the home button to access Sample Measurement Menu.
- Tap on Run Serum.
- Open the door of the probe when Open Door appears on the screen.
- Move the sample container to the sample probe, making sure the probe aperture is submerged in the solution, to introduce the sample as soon as Load Sample appears on the screen
- Remove ample from the probe when WIPE PROBE & CLOSE DOOR is displayed
- Clean the probe with a cotton and close the door
- Enter the ID by scanning with a bar code reader or keyboard or the touchpad of the analyzer once the 30 seconds countdown commence.
- The test results will be displayed on the screen after the electrolytes are measured.
- To retrieve results, tap o the Results button to access the Sample Measurement Menu.
- Tap to select the sample type
- Control with the navigation keys to access your results. You can also obtain your result by tapping on the search button and entering the ID.
- You can now tap on the print button to print your results.
Testing for Electrolytes Using Urine
- Dilute the urine with the urine diluent provided in a ratio 1 part of urine is to 2 pars of the diluent.
- Run the control
- Tap on Run Urine.
- Follow the procedure above from the third step.
Final thoughts
The world’s most advanced electrolyte analyzer is very easy and simple to use even with its complex principle. The smartlyte Electrolyte analyzer is now being used in most clinical and research settings due to its work input and portability. Take a look at the best electrolyte analyzers used in both clinical and research laboratories.