The Rotary Microtome
In histology, the study of the microscopic structure of tissues, rotary microtomes are a vital instrument. Scientists, physicians, and trainees can investigate the makeup and functioning of tissues at the cellular level thanks to the use of these instruments for cutting thin, consistent chunks of tissue samples for microscopic analysis. This microtome can create accurate sections of varied thicknesses of embedded tissues by using a blade mounted on the arm of the microtome. These sections are then placed on labeled glass slides, stained, and viewed under a microscope. Rotary microtomes are a crucial part of the histology discipline since they are widely employed in research, diagnosis, and education. Find out about the cryostat microtome.
What is the Rotary microtome?
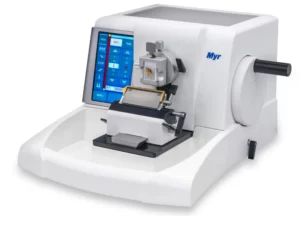
A rotary microtome is a scientific tool used to slice tissue samples into uniformly thin pieces for microscopic analysis. It is a tool that cuts tissue into tiny slices using a blade installed on a rotary arm and a sample holder that moves carefully. It is made of a microtome wheel, which raises and lowers the tissue holder with respect to the fixed blade and can be used to alter the size of the sections. The study of the microscopic, cell structure of tissues is made possible by the widespread use of rotary microtomes in the discipline of histology.
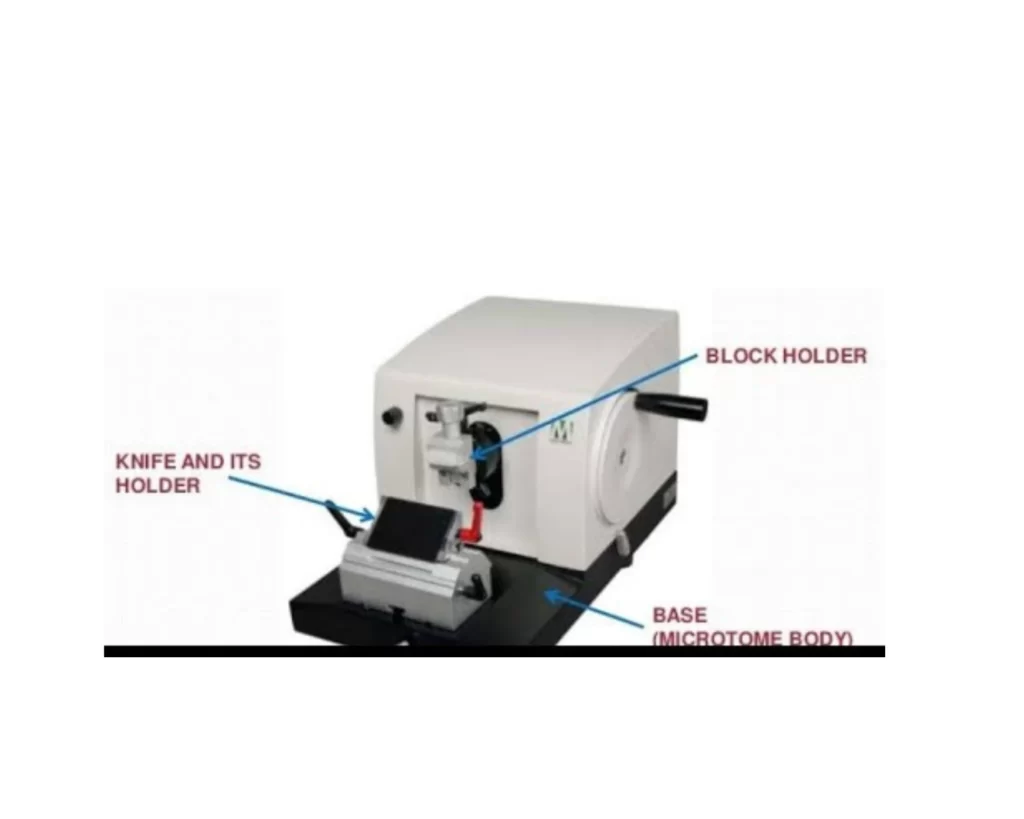
Main Parts of the Rotary Microtome

- Base– It is a strong foundation that holds the whole device in place.
- Sample holder- It is a device that keeps the tissue sample in position while it is being sliced. It makes thin tissue sections by making precise movements.
- Blade– It divides tissues into thin slices when it is precisely positioned and sharp.
- Microtome wheel- It regulates the sample holder’s position in reference to the blade, one can change the size of the tissue slices
- Object clamp– It holds the tissue sample in a fixed position and prevents movement.
- Feed mechanism- It regulates the up and down movement of the holder to ensure uniform sectioning of tissues.
What is the principle of the Rotary Microtome- How does it Work?
The rotary microtome relies on the idea of slicing uniformly thin pieces of tissue samples using a sharp edge mounted on a rotating arm. To make it simpler to slice, the tissue sample is first embedded in a medium, such as paraffin wax. In order to make contact with the blade, the sample must first be put onto the sample holder. The blade cuts a small piece of the tissue sample as it passes over the sample holder. Read about how the video otoscope works
Rotating the microtome wheel will raise or lower the sample holder with respect to the blade and allows you can change the thickness of the sections. The tissues are uniformly sectioned due to the feed mechanism, which regulates how the sample holder moves across the blade. To make the tissue slices easier to see under a microscope, the tissue samples are arranged on glass slides and dyed. Take a look at GSI audiometers.
The microtome depends on the accurate positioning and operation of its components to guarantee the caliber of the tissue slices produced. For accurate slices, the sample holder must move in a controlled fashion, and the blade must be sharp and well-positioned. This will result in chunks of uniform thickness.
A step-by-step guide to using the Rotary Microtome
- Sample Preparation- Tissues must be embedded in paraffin wax or any other embedding medium to provide a firm medium to enable sectioning.
- Insert the sample- Place the tissue sample in the sample holder.
- Configure microtome settings- This is done to adjust the microtome’s settings to the appropriate thickness.
- Set up the blade- Make sure that the blade has been sharpened and placed at the right angle to enable sectioning.
- Begin cutting- Rotate the microtome wheel to bring the tissue holder closer to the sharp edge to enable thin sections to be generated.
- Float tissues- The tissues are placed in a water bath filled with distilled water at 37oC to avoid overlapping of tissues ad remove excess paraffin wax.
- Gather tissues- The tissues can now be arranged on the glass slides for staining.
- Repeat the process- Start all over again to obtain many tissues. Read about the sliding microtome.
Are there any Safety Precautions to Note When Using a Rotary Microtome?
- Personal Protective Equipment– Wear PPE such as googles and gloves for protection.
- Electrical safety– Make sure that the main plug is grounded and not faulty before starting the microtome.
- Proper handling– Be careful when handling sharp parts of the microtome to prevent unintentional cuts.
Conclusion
The history of rotary microtomes is vast and fascinating, spanning several centuries. They have been an essential tool in histology and other branches of biology, enabling researchers to closely analyze biological samples. Modern rotary microtomes are getting better all the time, including new functions and technology that boost accuracy and effectiveness. In general, rotary microtomes are a crucial tool for researchers who want to comprehend the complexity of biological tissues and samples. Do not forget to read about tissue processors.